
ColdFusion ZipUtility Component Can Now Write Directly To An Output Stream
A few days ago, I posted my ColdFusion ZipUtility.cfc code that I was developing in order to zip code snippet files. One of the short coming of that version of the ZipUtility.cfc was that it required writing the Zip data to a physical file on the server. This is highly recommending for anything that is going to be large, but for my use case (zipping together code snippets), the files sizes are going to be so minimal, I didn't want to bother writing the zip data to the file system.
To overcome this, I have updated the ColdFusion ZipUtility.cfc's Compress() method to take either a file name or an existing output stream. If a file is passed in, then it just creates the standard File Output Stream and wraps the Zip Output Stream around it. If, however, you pass in an output stream of some sort, the Zip Output Stream then wraps around that.
Here is an updated example that does not write any data to a file on the file system:
<!--- Create an instance of the Zip utility. --->
<cfset objZip = CreateObject( "component", "ZipUtility" ).Init() />


<!---
	Zip entries can be added as file paths. This
	is pretty starndard. Here we can add N file
	path arguments.
--->
<cfset objZip.AddFileEntry(
	ExpandPath( "./data/file_a.jpg" ),
	ExpandPath( "./data/file_b.jpg" )
	) />


<!---
	Zip entries can be also be added as actual text
	entries that will be stored as text files.
--->
<cfset objZip.AddTextEntry(
	Text = "This is a text file.",
	Name = "text_entry.txt"
	) />


<!---
	In addition to text data, we can also add binary
	data directly to the zip file. In this demo, we are
	going to read in the image binary and then add it
	as a zip entry.
--->
<cffile
	action="READBINARY"
	file="#ExpandPath( './data/file_e.jpg' )#"
	variable="binFileData"
	/>

<!--- Add binary image data directly to zip file. --->
<cfset objZip.AddByteEntry(
	ByteArray = binFileData,
	Name = "file_e.jpg"
	) />


<!---
	ASSERT: At this point, we have defined what files,
	text and binary data is going to end up in the Zip
	file. The Zip file has NOT yet been written.
--->


<!---
	Instead of writing the zip file to a file, we are
	going to write it directly to our own output stream.
	In this fashion, we can skip interacting with the
	file system for output output.

	For the output stream, we are going to create a
	Java byte array output stream.
--->
<cfset objOutputStream = CreateObject(
	"java",
	"java.io.ByteArrayOutputStream"
	).Init()
	/>


<!---
	Compress this zip file. Instead of passing in a target
	file to the compression method, we are going to pass
	in the byte array output stream we just created. This
	will get the compression algorithm to write the zip
	data directly to our byte array.
--->
<cfset objZip.Compress(
	objOutputStream
	) />


<!---
	Now that we have all the zip data written to our
	output stream, we need to give this output stream
	data to the user.
--->
<cfheader
	name="content-disposition"
	value="attachment; filename=files.zip"
	/>

<!---
	Tell the client to expect a file of type ZIP. From
	our output stream, get the byte array (binary object)
	and pass that to the Variables attribute.
--->
<cfcontent
	type="application/zip"
	variable="#objOutputStream.ToByteArray()#"
	/>
Notice that at the bottom, I am creating a Java ByteArrayOutputStream. I chose this output stream (from the numerous Java file I/O decorators) since it seemed like the easiest one from which to get a binary object (ToByteArray()) that I could then use with ColdFusion CFContent and the Variable attribute.
Once I create the output stream, I then just pass it into the ColdFusion ZipUtility.cfc's Compress() method. Since Java objects are passed by reference, I don't have to worry about getting any returned reference to the output object. After the zip is done being written to the output, I then convert it to a binary object (using the output stream's ToByteArray() method) and stream it to the client using the CFContent tag.
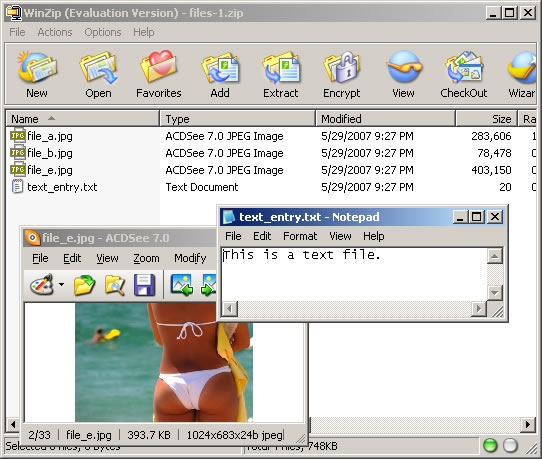
This way, all file output is avoided and there is nothing to clean up. Running the above code, here is the result zip file. I have openned up several of the items to prove that adding text entries and file binaries still works:
The updated ColdFusion ZipUtility.cfc I am using to create these zip files is here:
<cfcomponent
	output="false"
	hint="Handles the zipping of files.">

	<!---
		Set up an instance struct to hold instance-
		specific data values.
	--->
	<cfset VARIABLES.Instance = StructNew() />

	<!---
		This will hold the array of all target files to
		be included in the resultant zip file.
	--->
	<cfset VARIABLES.Instance.FileEntries = ArrayNew( 1 ) />

	<!---
		This will hold an array of byte structures. Each
		array entry will hold a byte array and a name
		of the designated file.
	--->
	<cfset VARIABLES.Instance.ByteEntries = ArrayNew( 1 ) />


	<cffunction
		name="Init"
		access="public"
		returntype="any"
		output="false"
		hint="Returns an initialized component instance.">

		<!--- Return This reference. --->
		<cfreturn THIS />
	</cffunction>


	<cffunction
		name="AddByteEntry"
		access="public"
		returntype="void"
		output="false"
		hint="Adds a byte array entry with the given name to the zip file ">

		<!--- Define arguments. --->
		<cfargument
			name="ByteArray"
			type="any"
			required="true"
			hint="The byte array data entry."
			/>

		<cfargument
			name="Name"
			type="string"
			required="true"
			hint="The name of the file used to store the byte array."
			/>


		<!---
			Store the arguments directly into the byte entries.
			As long as it can be referenced like a struct AND
			it already exists, no need to create a new struct.
		--->
		<cfset ArrayAppend(
			VARIABLES.Instance.ByteEntries,
			ARGUMENTS
			) />

		<!--- Return out. --->
		<cfreturn />
	</cffunction>


	<cffunction
		name="AddFileEntry"
		access="public"
		returntype="void"
		output="false"
		hint="Adds one or more file paths to the resultan zip file.">

		<!--- Define arguments. --->
		<cfargument
			name="File"
			type="any"
			required="true"
			hint="File to be added. This can be a file or an array of files."
			/>


		<!--- Define the local scope. --->
		<cfset var LOCAL = StructNew() />

		<!---
			For this method, we are going to allow the
			flexability of adding multiple files at once. The
			first argument can be a file path or an array of
			file paths. If the first argument is a string, then
			we will assume the entire arguments array might be
			more than one file.
		--->
		<cfif IsSimpleValue( ARGUMENTS.File )>

			<!---
				Since the first argument is a string, let's
				assume the person may have passed in more than
				one argument where each argument is a file path
				to be added.
			--->
			<cfloop
				item="LOCAL.File"
				collection="#ARGUMENTS#">

				<cfset ArrayAppend(
					VARIABLES.Instance.FileEntries,
					ARGUMENTS[ LOCAL.File ]
					) />

			</cfloop>

		<cfelse>

			<!---
				Since the first argument is NOT a string, we
				are going to assume that it is an array of
				file paths. Therefore, add the entire array
				to the files list.
			--->
			<cfset VARIABLES.Instance.FileEntries.AddAll(
				ARGUMENTS.File
				) />

		</cfif>


		<!--- Return out. --->
		<cfreturn />
	</cffunction>


	<cffunction
		name="AddTextEntry"
		access="public"
		returntype="void"
		output="false"
		hint="Adds a text entry with the given name to the zip file ">

		<!--- Define arguments. --->
		<cfargument
			name="Text"
			type="string"
			required="true"
			hint="The text data entry."
			/>

		<cfargument
			name="Name"
			type="string"
			required="true"
			hint="The name of the file used to store the byte array."
			/>


		<!---
			Grab the byte array from the text data entry
			and just hand it off to the byte entry.
		--->
		<cfset THIS.AddByteEntry(
			ByteArray = ARGUMENTS.Text.GetBytes(),
			Name = ARGUMENTS.Name
			) />

		<!--- Return out. --->
		<cfreturn />
	</cffunction>


	<cffunction
		name="Compress"
		access="public"
		returntype="void"
		output="false"
		hint="Compresses the files and entries into the given file archive.">

		<!--- Define arguments. --->
		<cfargument
			name="File"
			type="any"
			required="true"
			hint="The file path of the destination archive file OR a output stream object."
			/>


		<!--- Define the local scope. --->
		<cfset var LOCAL = StructNew() />


		<!---
			Create the zip output stream. This will wrap
			around an output stream that writes to our
			destination archive file. If, however, the user
			has passed in an output stream object, then
			we will write directly to the output stream.

			Check to see if the file is a string (file name),
			or if it is a complex object.
		--->
		<cfif IsSimpleValue( ARGUMENTS.File )>

			<!---
				Create the output stream to be a file output
				stream pointing at the given file name.
			--->
			<cfset LOCAL.OutputStream = CreateObject(
				"java",
				"java.io.FileOutputStream"
				).Init(

					<!---
						Initialized the file IO object
						with the given file path of the
						target ZIP file.
					--->
					ARGUMENTS.File

					) />

		<cfelse>

			<!---
				An output stream of some sort was passed into
				the compression method. Therefore, instead of
				creating a file output stream, will just use
				the passed in output stream.
			--->
			<cfset LOCAL.OutputStream = ARGUMENTS.File />

		</cfif>


		<!---
			ASSERT: At this point, we have either created an
			output stream using a target file or we have used
			the passed in output stream. Either way, we now
			have a (potentially) valid output stream around
			which we can wrap out Zip Output Stream.
		--->


		<!---
			Create the zip outpu stream and wrap it around
			our target output stream.
		--->
		<cfset LOCAL.ZipOutputStream = CreateObject(
			"java",
			"java.util.zip.ZipOutputStream"
			).Init(

				<!--- Wrap Zip IO around output stream. --->
				LOCAL.OutputStream

				) />


		<!---
			Create a buffer into which we will read file data
			and from which the Zip output stream will read its
			data. The easiest way to create a byte array buffer
			is just to build a large string and return it's
			byte array.
		--->
		<cfset LOCAL.Buffer = RepeatString( " ", 1024 ).GetBytes() />


		<!---
			We need to add both the file entries and the byte
			array entries. Let's start out with the files.
		--->
		<cfloop
			index="LOCAL.Index"
			from="1"
			to="#ArrayLen( VARIABLES.Instance.FileEntries )#"
			step="1">

			<!---
				Get a short hand to the file path that we are
				working with.
			--->
			<cfset LOCAL.FilePath = VARIABLES.Instance.FileEntries[ LOCAL.Index ] />

			<!---
				Create a new zip entry for this file. To
				keep things simple, we are going to store
				all the files by their file name alone (no
				nesting of directories).
			--->
			<cfset LOCAL.ZipEntry = CreateObject(
				"java",
				"java.util.zip.ZipEntry"
				).Init(
					GetFileFromPath( LOCAL.FilePath )
					) />


			<!---
				Tell the Zip output that we are going to start
				a new zip entry. This will close all previous
				entries and move the output to point to the new
				entry point.
			--->
			<cfset LOCAL.ZipOutputStream.PutNextEntry(
				LOCAL.ZipEntry
				) />


			<!---
				Now that we have zip entry read to go, let's
				create a file input stream object that we can
				use to read the file data into a buffer.
			--->
			<cfset LOCAL.FileInputStream = CreateObject(
				"java",
				"java.io.FileInputStream"
				).Init(
					LOCAL.FilePath
					) />

			<!---
				Read from the file into the byte buffer. This
				will read as much as possible into the buffer
				and return the number of bytes that were read.
			--->
			<cfset LOCAL.BufferSize = LOCAL.FileInputStream.Read(
				LOCAL.Buffer
				) />


			<!---
				Now, we want to keep writing the buffer data
				to the zip output stream until the file read
				returns a length less than 1 indicating that
				no data was read into the buffer.
			--->
			<cfloop condition="(LOCAL.BufferSize GT 0)">

				<!---
					Write the contents of the buffer to the
					zip output steam.
				--->
				<cfset LOCAL.ZipOutputStream.Write(
					LOCAL.Buffer,
					JavaCast( "int", 0 ),
					JavaCast( "int", LOCAL.BufferSize )
					) />

				<!---
					Perform the next read of the file data
					into the buffer.
				--->
				<cfset LOCAL.BufferSize = LOCAL.FileInputStream.Read(
					LOCAL.Buffer
					) />

			</cfloop>


			<!---
				Now that we have finished writing this file to
				the zip output as the given zip entry, we
				need to close both the zip entry and the file
				output stream. This will prevent the system from
				locking the resources.
			--->
			<cfset LOCAL.ZipOutputStream.CloseEntry() />
			<cfset LOCAL.FileInputStream.Close() />

		</cfloop>


		<!---
			Now that all the files have been added, we need
			to add the byte array entries.
		--->
		<cfloop
			index="LOCAL.Index"
			from="1"
			to="#ArrayLen( VARIABLES.Instance.ByteEntries )#"
			step="1">

			<!---
				Get a short hand to the byte entry that we are
				working with. This will contain both the byte
				array and the name of the resultant file.
			--->
			<cfset LOCAL.ByteEntry = VARIABLES.Instance.ByteEntries[ LOCAL.Index ] />

			<!---
				Create a new zip entry for this file. This entry
				will be stored in the top level directory at the
				given name.
			--->
			<cfset LOCAL.ZipEntry = CreateObject(
				"java",
				"java.util.zip.ZipEntry"
				).Init(
					LOCAL.ByteEntry.Name
					) />


			<!---
				Tell the Zip output that we are going to start
				a new zip entry. This will close all previous
				entries and move the output to point to the new
				entry point.
			--->
			<cfset LOCAL.ZipOutputStream.PutNextEntry(
				LOCAL.ZipEntry
				) />


			<!---
				Write the contents of the byte array to the zip
				output steam. Since we have our entire byte
				array entry in memory, we don't have to deal
				with repeated reads.
			--->
			<cfset LOCAL.ZipOutputStream.Write(
				LOCAL.ByteEntry.ByteArray,
				JavaCast( "int", 0 ),
				JavaCast( "int", ArrayLen( LOCAL.ByteEntry.ByteArray ) )
				) />


			<!---
				Now that we have finished writing this byte
				entry to the zip output as the given zip entry,
				we need to close the zip entry.
			--->
			<cfset LOCAL.ZipOutputStream.CloseEntry() />

		</cfloop>


		<!---
			We have now written all of our file and byte
			entries to the zip archive file. Close the zip
			output stream so that it can be used.
		--->
		<cfset LOCAL.ZipOutputStream.Close() />


		<!--- Return out. --->
		<cfreturn />
	</cffunction>

</cfcomponent>
Remember, this method is recommended ONLY for small files and small collections. If you do all this without writing to the file system, you are using up the server's RAM (where the output stream is built). If you try this with a huge file, it might take down the server. I know that my code snippets will always be comparatively small, and therefore, I am not worried about using up the RAM. For me, the ease of not having to create a file outweighs the RAM costs.
Want to use code from this post? Check out the license.

Reader Comments
And how much RAM does your code require now?
@Warren,
The amount of RAM required is going to be directly related to the size of the data being compressed. If you are compressing a 100K file, you are going to need RAM to load the 100K file (less than 100K of RAM since it uses a file input stream which does not read it all at once... I think), plus the RAM to allocate space for the ZipUtility.cfc itself, plus RAM for the zip output stream (which would be no MORE than 100K assuming zero compression was possible).
Of course, I am not using this to zip 100K of stuff, so it will use much less RAM. But you get the idea - the more you zip, the more space is required in RAM to hold the individual files plus the output stream data.
If you zip a tiny file, it will take a tiny amount of RAM.
I keep getting an object instaniation error withthe File Input Stream in the compression fucntion? I added the classpath to my cf admin. Any suggestions ?
You shouldn't need to add any class path. All the file IO stuff is already part of Java that ColdFusion is running on top of. Make sure your file path is fully expanded.
this is awesome -- set me off noodling a number of modifications/uses for something similar I need to create.
thought maybe you could weigh in on an issue I'm trying to solve -- attempting to apply this in a way to also allow generation of two empty folders within this resulting .zip I've had little to no success in my reading up on the underlying java to accomplish. any directions you could point me in ?
@Alex,
It's interesting that you mention that, cause I just wrote my 4th part of a 5 part series on using the new CFZip tag in ColdFusion 8. I played around with trying to add empty directories to an archive using CF8 and I could not figure it out there either. It always told me that you couldn't create a zip with nothing in it.
I suppose what you could do is zip a file into a directory, then delete the file... this might keep the directory itself. I know that a zip CAN have empty directories cause I can create them using WinZip / WinRAR.
Long story short, I don't have an answer for you at this moment, but I can poke around, see what I can find.
@Lalit,
The Variable attribute of the CFcontent tag was introduced in CFMX 7. I assume you are in MX6. In order to get it to work, you are going to have to actually write the Zip binary data to the underlying byte buffer of the response (which sits on top of the character response buffer).
At lunch, I will see if I can whip up an example of this.
@Lalit,
I was gonna try to write up an example, but Christian Cantrell has a pretty good explanation here (which is basically what I would have copied):
http://weblogs.macromedia.com/cantrell/archives/2003/06/using_coldfusio.cfm
From the comments, it looks like there are few issues with MX 6.1, but some of the code just needs to be commented out. Hope this helps you out a bit. I am not too familiar with the underlying servlet stuff.
Hello,
On CF6, and still having trouble with
<cfcontent type="application/x-zip-compressed" variable="#objOutputStream.ToByteArray()#"/>
Couldn't quite get the solution here to work: http://weblogs.macromedia.com/cantrell/archives/2003/06/using_coldfusio.cfm
Does anyone have other ideas/approaches?
Any help would be greatly appreciated.
I used this CFC since I have to zip some UTF-8 content. It doesn't work with UTF-8 content. With chines or arabic characters you will have wrong results. I started to go into the java classes to correct that but I remember the new CFZIP tag with CF8. I used the CF8 CFZIP tag with success. I hope that could help.
@Eric00000007,
Yeah, now that ColdFusion 8 has built-in zip functionality with CFZip and CFZipParam, I would start using that. I am sure it is much more powerful than my hacked-together object.
Ben,
The ability to go memory-to-memory greatly speeds up compression. We typically accept very large XML files, which we have to save as an audit trail to an Oracle database. Rather than save them in CLOB format (character, like Transact-SQL's text datatype), we run them through the Java zip package's "Deflate" method, which is memory-to-memory, and save them in BLOB format (binary) instead.
The source code for a Deflate stepping stone that can be called from ColdFusion is like, 20 lines of code with comments. Pretty trivial. The space savings over CLOB and the speed savings over using the file system are both pretty amazing.
(aside)
BLOB and CLOB take up no space when NULL, so you can avoid the overhead of either with a varchar(255) column, for example, and use that if the uncompressed XML fits.
(/aside)
@Steve,
I have never used the Deflater stuff in the Zip libraries. I am not sure I even knew what it was for. Sounds like you're getting some pretty good saving with it. Thanks for the tip!
Actually, you're probably already using deflate without realizing it:
http://www.faqs.org/rfcs/rfc1951.html
In particular, web servers and browsers support it. The HTTP header Accept-Encoding can take "deflate" as one of the values. (Example, "Accept-Encoding: gzip,deflate".) So if the browser and the web server both support deflate, the transfer time can be significantly shortened through compression.
I was reading through some Cross Origin Resource Sharing documentation. It listed some HTTP headers to show the new Origin header. Seeing Accept-Encoding there reminded me that I never responded about how plentiful the use of deflate is. Everyone talks about zip. No one talks about deflate. But it's deflate that does the real work of zip.
@Steve,
On an off-note, I started playing around Node.js this weekend. One of the tutorials they lead you through is building a small HTTP server. I thought that was cool; but when you think about ALLLLL of the logic that web servers put into packaging request (eTags, deflate, accept-encoding, etc.), it makes the building of your own HTTP server seems like a monumental task.
I need to zip the file and store it in binary format in sql server. Can you please help in this regard. Do I need to insert the variable #objOutputStream.ToByteArray()# in DB?
HI,
Is it possible to zip a folder that contains multiple subfolder and files?
Thanks & Regards,
Shruthi N