Using ColdFusion Custom Tags To Create An HTML Email DSL In Lucee CFML 5.3.7.47, Part VII
I've been making some wonderful progress on my ColdFusion custom tag DSL (Domain Specific Language) for HTML emails! We've looked at how HTML tags are abstracted away; and, how themes can be applied to those HTML tag abstractions; and, how we can apply responsive styling on mobile email clients; and, how we can add support for Dark Mode; and, how we can use advanced content projection techniques to build complex widgets. So, this morning, I just wanted to do a quick recap of the various encapsulation techniques that we can use when building HTML emails in Lucee CFML 5.3.7.47.
View this code in my ColdFusion Custom Tag Emails project on GitHub.
Technique One: Using CFInclude
We've been getting so deep into the use of ColdFusion custom tags in order to generate our HTML emails, it's temping to think that everything has to be implemented as a Custom Tag. But, this is all still just ColdFusion. Which means that we can use all the standard ColdFusion tools that provide reusability. And, one of the oldest and easiest techniques to use is the <cfinclude> tag to pull a CFML template into another rendering context.
In the case of HTML emails, we can <cfinclude> any content into any email:
<html:h2>
	Technique 1: ColdFusion template include
</html:h2>

<!---
	Everything we've been looking at lately revolves around ColdFusion Custom
	Tags. However, this is all still "just" ColdFusion. Which means, we can use
	every tool in the tool-belt, including plain-old includes.
--->
<cfinclude template="./ex8/description.cfm" />
Here, I'm just including one snippet of shared content into the email:
<!--- Import custom tag libraries. --->
<cfimport prefix="html" taglib="../core/html/" />

<!--- // ------------------------------------------------------------------------- // --->
<!--- // ------------------------------------------------------------------------- // --->

<html:p>
	Since ColdFusion custom tags are still "just" ColdFusion, it means that we can use
	all the normal ColdFusion constructs. Such as reusing content by way of the CFInclude
	tag. This content can now be included anywhere.
</html:p>
Notice that I can even use our ColdFusion custom tag DSL inside the CFInclude. Easy peasy!
Technique Two: ColdFusion Custom Tag Attributes
The next approach to encapsulation and reusability is to pass data around using ColdFusion custom tag attributes. This is akin to using the ColdFusion custom tag as a <cfinclude> tag with data-passing behaviors:
<html:h2>
	Technique 2: ColdFusion custom tag attributes
</html:h2>

<!---
	After a CFInclude, the next most natural concept for ColdFusion Custom Tag
	encapsulation is attribute-based data passing. Here, we have an Avatar tag
	that can either render an image (if given an imageUrl); or, an initials-
	based visual if no image is available.
--->
<ex8:Avatar
	imageUrl="https://bennadel-cdn.com/images/global/ben-nadel-avatar.jpg"
	size="42"
/>

<ex8:Avatar
	initials="BN"
	size="42"
	fontSize="16"
/>
In this case, we have an Avatar.cfm ColdFusion custom tag that exposes attributes for data passing. This tag renders as an avatar either as an image (if an imageUrl value is provided; or, as a set of initials of no image is available.
<!--- Import custom tag libraries. --->
<cfimport prefix="core" taglib="../core/" />
<cfimport prefix="html" taglib="../core/html/" />

<!--- Define custom tag attributes. --->
<cfparam name="attributes.fontSize" type="numeric" default="14" />
<cfparam name="attributes.imageUrl" type="string" default="" />
<cfparam name="attributes.initials" type="string" default="" />
<cfparam name="attributes.margins" type="string" default="none normal" />
<cfparam name="attributes.size" type="numeric" default="36" />

<!--- // ------------------------------------------------------------------------- // --->
<!--- // ------------------------------------------------------------------------- // --->

<cfswitch expression="#thistag.executionMode#">
	<cfcase value="start">
		<cfoutput>

			<!---
				With attribute-based encapsulation, all the information we need to render
				the Avatar is provided via the Attributes scope. As such, we only need to
				use the START execution mode of the ColdFusion custom tag.
			--->

			<!--- Use the image-based rendering. --->
			<cfif len( attributes.imageUrl )>

				<core:HtmlEntityTheme entity="td">
					height: #attributes.size#px ;
					width: #attributes.size#px ;
				</core:HtmlEntityTheme>
				<core:HtmlEntityTheme entity="img">
					border-radius: #attributes.size#px ;
					display: block ;
					height: #attributes.size#px ;
					width: #attributes.size#px ;
				</core:HtmlEntityTheme>

				<html:table width="#attributes.size#" align="left" margins="#attributes.margins#">
				<html:tr>
					<html:td align="center" valign="center" class="html-entity-line-height-reset">

						<html:img
							src="#attributes.imageUrl#"
							width="#attributes.size#"
							height="#attributes.size#"
							alt="#attributes.initials#"
						/>

					</html:td>
				</html:tr>
				</html:table>

			<!--- Use the initials-based, text-only rendering. --->
			<cfelse>

				<core:HtmlEntityTheme entity="td">
					background-color: ##121212 ;
					border-radius: #attributes.size#px ;
					color: ##ffffff ;
					font-size: #attributes.fontSize#px ;
					height: #attributes.size#px ;
					letter-spacing: 1px ;
					line-height: #attributes.fontSize#px ;
					width: #attributes.size#px ;
				</core:HtmlEntityTheme>

				<html:table width="#attributes.size#" align="left" margins="#attributes.margins#">
				<html:tr>
					<html:td align="center" valign="center">

						#encodeForHtml( attributes.initials )#

					</html:td>
				</html:tr>
				</html:table>

			</cfif>

			<!--- Make sure this tag has NO BODY. --->
			<cfexit method="exitTag" />

		</cfoutput>
	</cfcase>
</cfswitch>
This one really starts to shine a light on how powerful ColdFusion custom tag encapsulation can be - just look at how much rendering logic is being abstracted away behind a handful of tag-attributes.
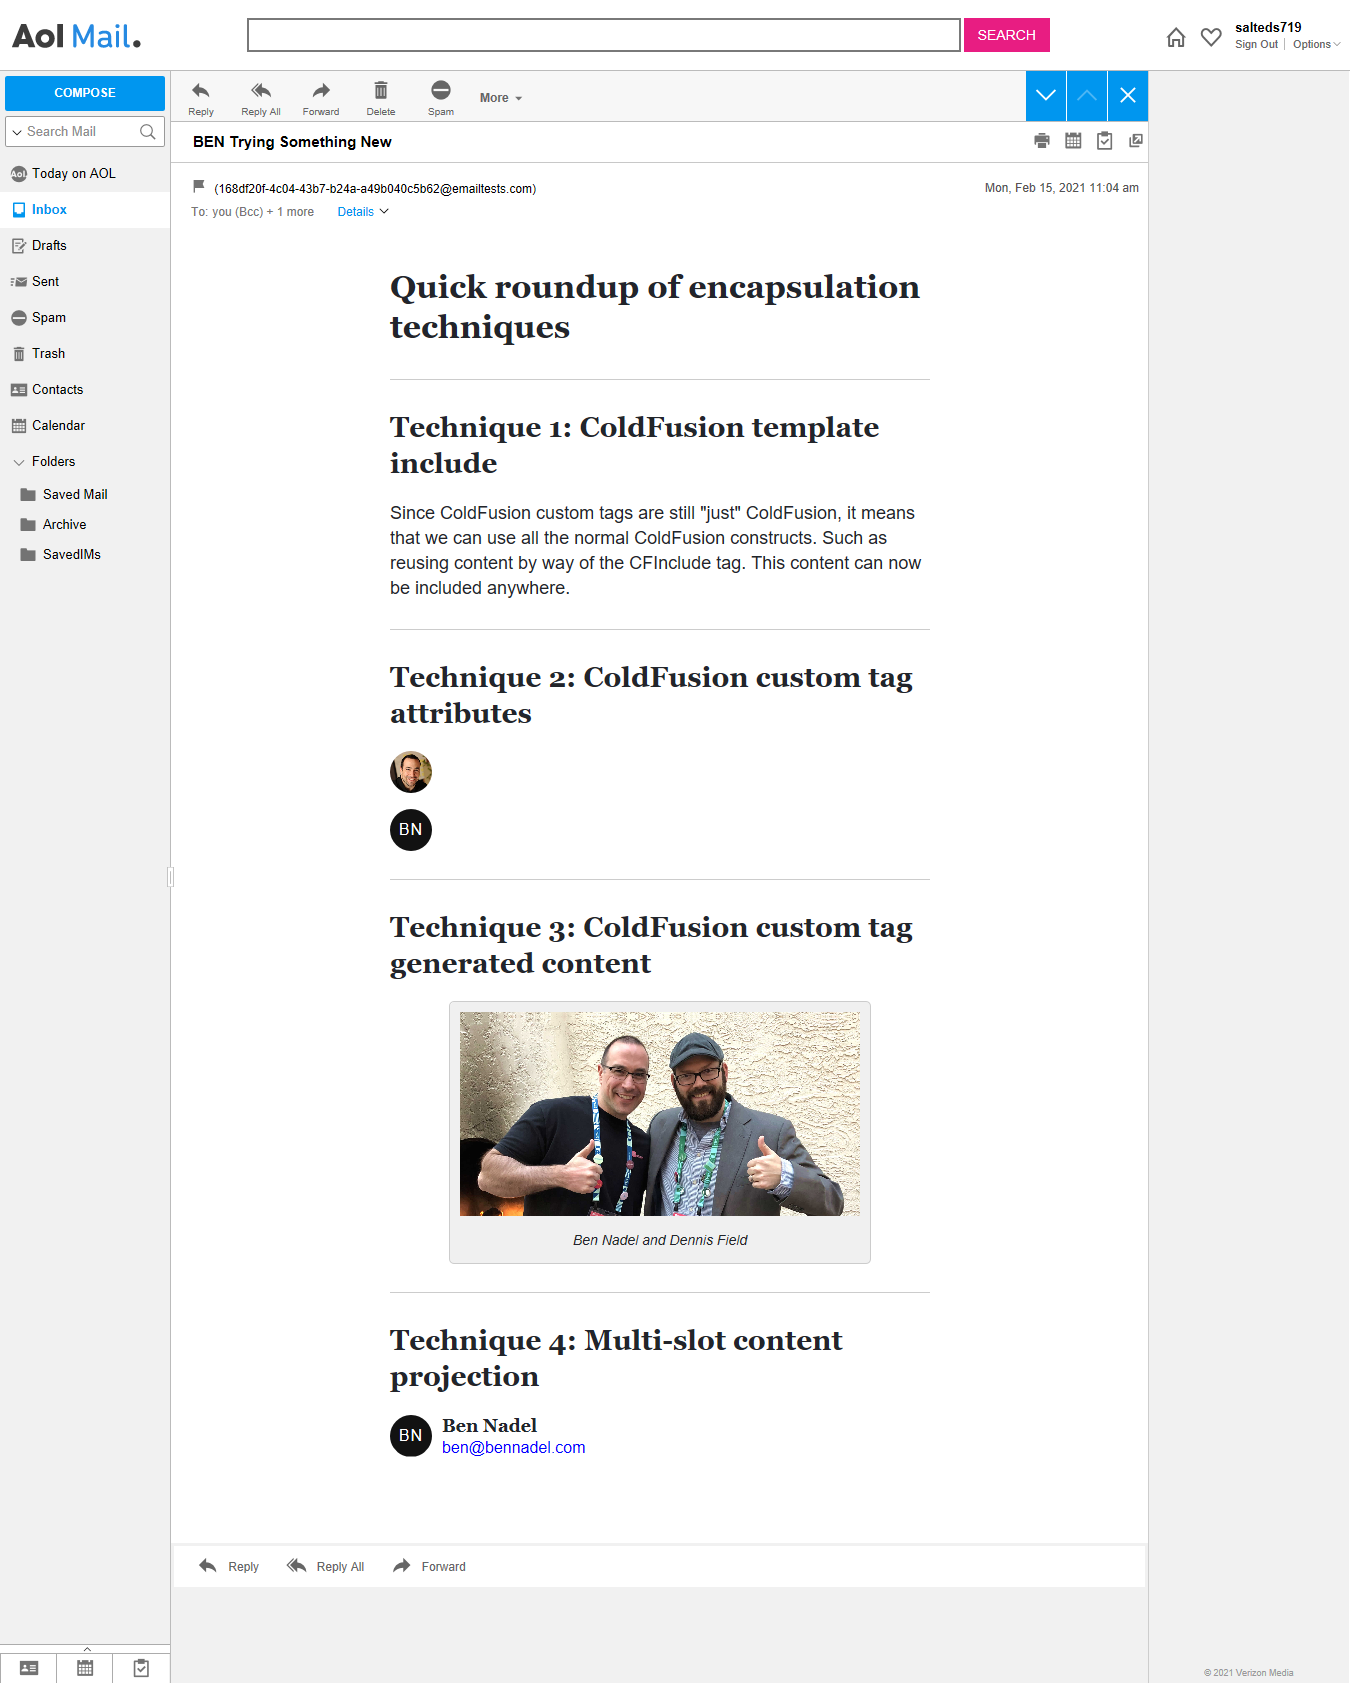
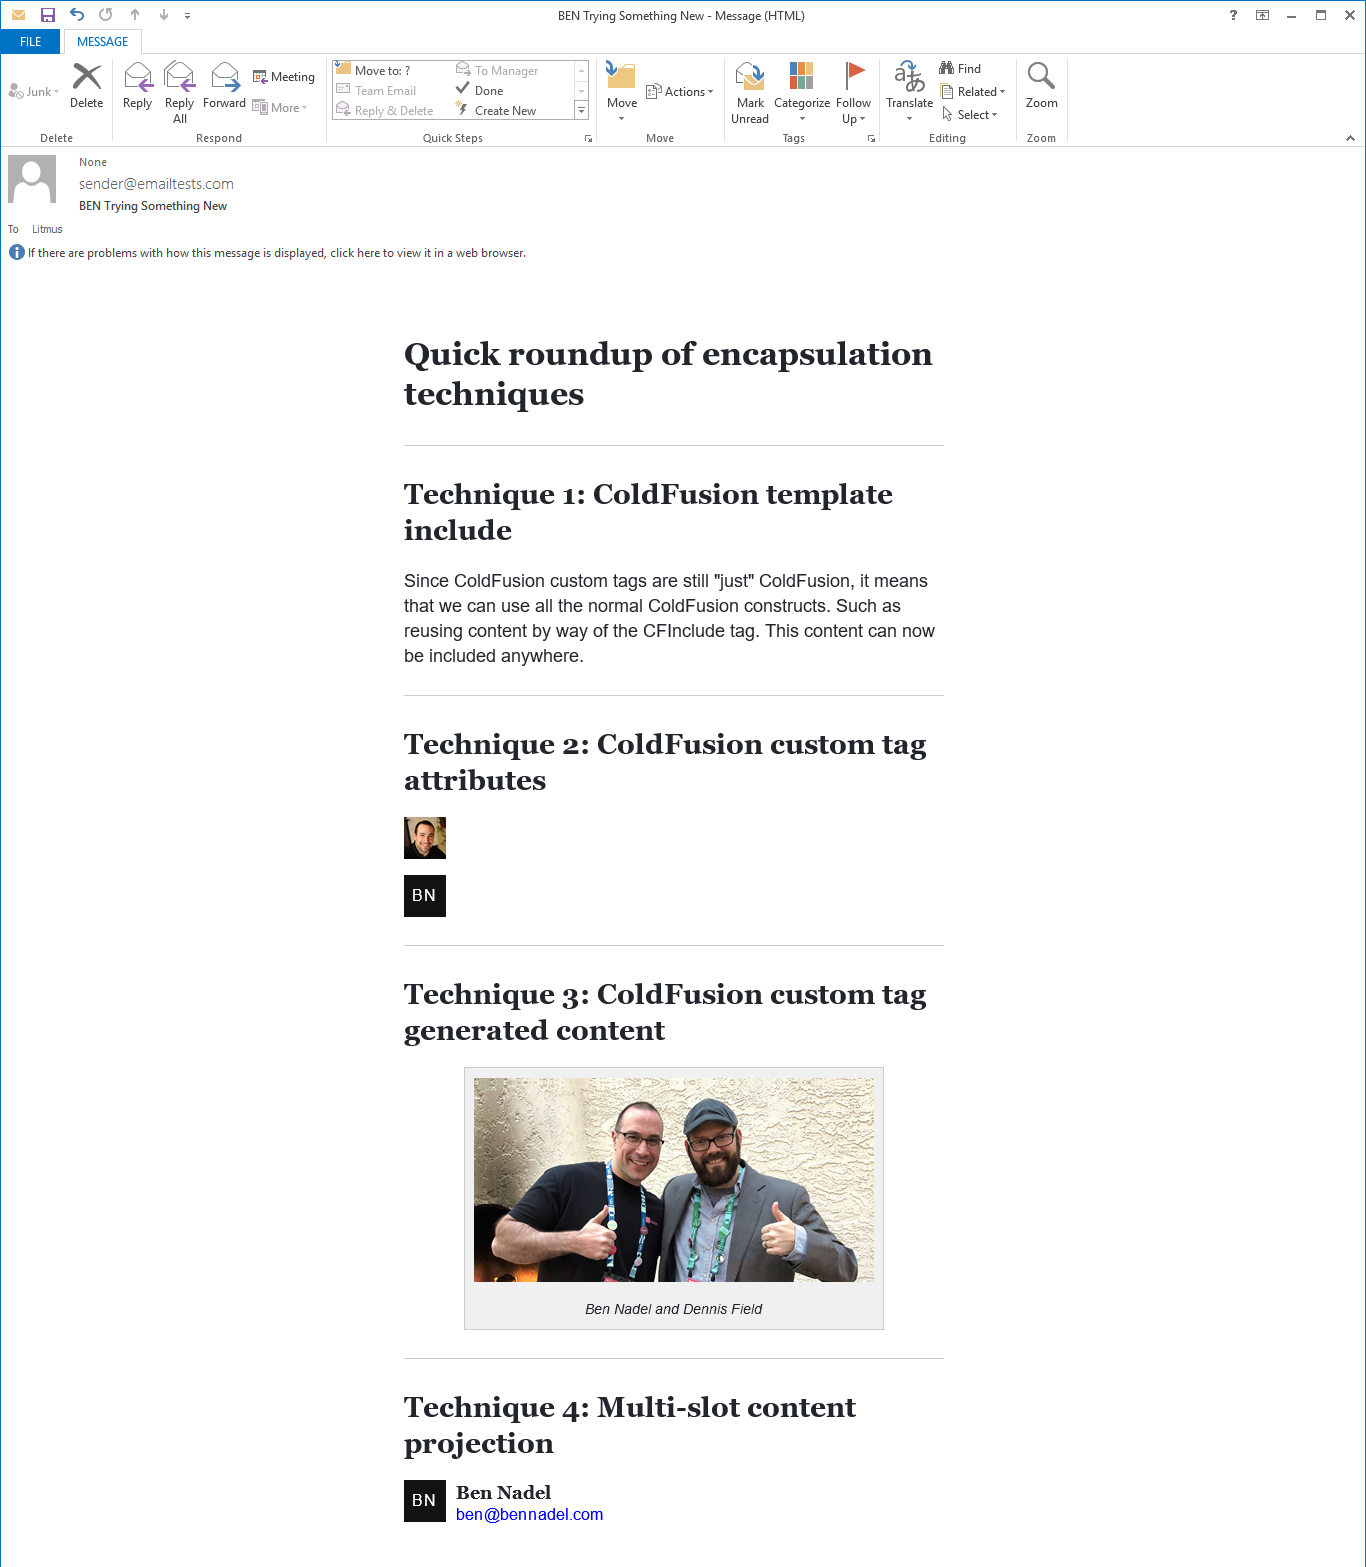
Technique Three: ColdFusion Custom Tag Generated Content
In addition to tag attributes, ColdFusion custom tags can also consume the content that is generated in the calling context between its Open and Close tags (ie, between the start execution mode and the end execution mode). This technique can be combined with tag attributes, providing a multi-faceted abstraction layer.
<html:h2>
	Technique 3: ColdFusion custom tag generated content
</html:h2>

<!---
	Beyond attributes, the next encapsulation technique is to use the generated
	content of the ColdFusion custom tag to wrap the rendering in some additional
	layout. This works really well if the enhanced rendering is fairly
	straightforward. In this case, we're wrapping the given IMG inside a "tile".
	Notice that we can COMBINE the generated content with tag attributes (in this
	case we're passing in the "caption" as an attribute).
--->
<ex8:ImageTile caption="Ben Nadel and Dennis Field">
	<html:img
		src="https://bennadel-cdn.com/images/header/photos/dennis_field.jpg"
		width="400"
		height="204"
		alt="Ben Nadel and Dennis Field, thumbs-up style!"
	/>
</ex8:ImageTile>
Here, we're wrapping an Image tag inside of a "tile" that also renders an option caption. Notice that the image is being provide as the tag's generatedContent while the caption is being provided as a tag attribute:
<!--- Import custom tag libraries. --->
<cfimport prefix="core" taglib="../core/" />
<cfimport prefix="html" taglib="../core/html/" />

<!--- Define custom tag attributes. --->
<cfparam name="attributes.caption" type="string" default="" />
<cfparam name="attributes.margins" type="string" default="none normal" />

<!--- // ------------------------------------------------------------------------- // --->
<!--- // ------------------------------------------------------------------------- // --->

<cfswitch expression="#thistag.executionMode#">
	<cfcase value="start">
		<cfoutput>

			<!---
				Since we're consuming the generated content of this ColdFusion custom
				tag, it means we can use the START execution mode as a means to define
				custom themeing for the child content. In this case, we're going to
				make sure the embedded IMG tag is BLOCK display; and that it has some
				responsive styles on smaller screens.
			--->
			<core:HtmlEntityTheme entity="img">
				display: block ;
			</core:HtmlEntityTheme>
			<core:MaxWidthStyles>
				.ex8-image-tile img {
					height: auto ;
					width: 100% ;
				}
			</core:MaxWidthStyles>

		</cfoutput>
	</cfcase>
	<cfcase value="end">
		<cfoutput>

			<core:HtmlEntityTheme entity="td">
				background-color: ##f0f0f0 ;
				border: 1px solid ##cccccc ;
				border-radius: 5px 5px 5px 5px ;
				padding: 10px 10px 10px 10px ;
			</core:HtmlEntityTheme>
			<core:HtmlEntityTheme entity="p">
				font-style: italic ;
				font-size: 14px ;
				text-align: center ;
			</core:HtmlEntityTheme>

			<!--- NOTE: Including cellpadding for older email clients. --->
			<html:table cellpadding="10" margins="#attributes.margins#" class="ex8-image-tile">
			<html:tr>
				<html:td class="html-entity-line-height-reset">

					<!--- PROJECTING the Generated Content into this rendering --->
					#thistag.generatedContent#
					<!--- PROJECTING the Generated Content into this rendering --->

					<cfif len( attributes.caption )>

						<html:p margins="small none">
							#encodeForHtml( attributes.caption )#
						</html:p>

					</cfif>

				</html:td>
			</html:tr>
			</html:table>

			<!--- Reset the generated content since we're overriding the output. --->
			<cfset thistag.generatedContent = "" />

		</cfoutput>
	</cfcase>
</cfswitch>
Once we start projecting generated content into the ColdFusion custom tag logic, we can begin to leverage the start mode of the tag to define custom themes for the generated content. This is one my favorite features of this DSL as it allows us to separate the content from the layout much more cleanly.
Technique Four: Multi-Slot Content Projection
If you think about the above technique (three) as being single-slot content projection, we can use the <core:Slot> tag to facilitate multi-slot content projection in which we pass several pieces of distinct content into the ColdFusion custom tag for even more advanced layout techniques:
<html:h2>
	Technique 4: Multi-slot content projection
</html:h2>

<!---
	If the native generated content feature of ColdFusion custom tags isn't
	sufficient, we can use multi-slot content projection. This combines the
	native generated content feature with a special Slot tag in the DSL that
	stores low-level generated content into the parent tag's variables space.
	In this case, we're using three slots to build an Avatar card. And, note
	that all the techniques build on top of each other - one of the Slots
	contains the Avatar encapsulation which uses data-attribute encapsulation.
--->
<ex8:AvatarCard>
	<core:Slot name="avatar">
		<ex8:Avatar
			initials="BN"
			size="42"
			fontSize="16"
			margins="none"
		/>
	</core:Slot>
	<core:Slot name="name">
		Ben Nadel
	</core:Slot>
	<core:Slot name="email">
		ben@bennadel.com
	</core:Slot>
</ex8:AvatarCard>
In this example, we're actually combining techniques: we're using the Avatar.cfm tag-attribute concept with the multi-slot content projection.
<!--- Import custom tag libraries. --->
<cfimport prefix="core" taglib="../core/" />
<cfimport prefix="html" taglib="../core/html/" />

<!--- Define custom tag attributes. --->
<cfparam name="attributes.margins" type="string" default="none normal" />

<!--- // ------------------------------------------------------------------------- // --->
<!--- // ------------------------------------------------------------------------- // --->

<cfswitch expression="#thistag.executionMode#">
	<cfcase value="start">
		<cfoutput>

			<!---
				Since we're using multi-slot content projection in this ColdFusion custom
				tag, it means that we have to define the possible SLOTS in the START
				execution mode of this tag. These variables can be set with default
				values, which will then be overridden during the child-content rendering.
			--->
			<cfset slots = {
				avatar: "",
				name: "",
				email: ""
			} />

		</cfoutput>
	</cfcase>
	<cfcase value="end">
		<cfoutput>

			<core:HtmlEntityTheme entity="td" class="avatar">
				padding: 0px 10px 0px 0px ;
			</core:HtmlEntityTheme>
			<core:HtmlEntityTheme entity="td" class="info">
				padding: 0px 0px 0px 0px ;
			</core:HtmlEntityTheme>
			<core:HtmlEntityTheme entity="h4" class="name">
				font-size: 18px ;
				line-height: 23px ;
			</core:HtmlEntityTheme>
			<core:HtmlEntityTheme entity="p" class="email">
				color: ##999999 ;
				font-size: 16px ;
				line-height: 18px ;
			</core:HtmlEntityTheme>

			<!--- NOTE: Including cellpadding for older email clients. --->
			<html:table align="left" cellpadding="10" margins="#attributes.margins#">
			<html:tr>
				<html:td valign="center" class="avatar">

					#slots.avatar#

				</html:td>
				<html:td valign="center" class="info">

					<html:h4 margins="none xxxsmall" class="name">
						#slots.name#
					</html:h4>

					<html:p margins="none" class="email">
						#slots.email#
					</html:p>

				</html:td>
			</html:tr>
			</html:table>

		</cfoutput>
	</cfcase>
</cfswitch>
And, while I'm not showing it in this example, we could easily have used tag-attributes as a data-passing technique in combination with the multi-slot content projection. All of these different approaches can build on top of each other.
Wrapping It Up
To wrap this up, here's the entirety of the example code in a single HTML email template:
<!--- Import custom tag libraries. --->
<cfimport prefix="core" taglib="./core/" />
<cfimport prefix="ex8" taglib="./ex8/" />
<cfimport prefix="html" taglib="./core/html/" />

<!--- // ------------------------------------------------------------------------- // --->
<!--- // ------------------------------------------------------------------------- // --->

<core:Email
	subject="Encapsulation techniques"
	teaser="Exposing APIs and hiding complexity!">
	<core:Body>

		<html:h1>
			Quick roundup of encapsulation techniques
		</html:h1>

		<html:hr />

		<html:h2>
			Technique 1: ColdFusion template include
		</html:h2>

		<!---
			Everything we've been looking at lately revolves around ColdFusion Custom
			Tags. However, this is all still "just" ColdFusion. Which means, we can use
			every tool in the tool-belt, including plain-old includes.
		--->
		<cfinclude template="./ex8/description.cfm" />

		<html:hr />

		<html:h2>
			Technique 2: ColdFusion custom tag attributes
		</html:h2>

		<!---
			After a CFInclude, the next most natural concept for ColdFusion Custom Tag
			encapsulation is attribute-based data passing. Here, we have an Avatar tag
			that can either render an image (if given an imageUrl); or, an initials-
			based visual if no image is available.
		--->
		<ex8:Avatar
			imageUrl="https://bennadel-cdn.com/images/global/ben-nadel-avatar.jpg"
			size="42"
		/>

		<ex8:Avatar
			initials="BN"
			size="42"
			fontSize="16"
		/>

		<html:hr />

		<html:h2>
			Technique 3: ColdFusion custom tag generated content
		</html:h2>

		<!---
			Beyond attributes, the next encapsulation technique is to use the generated
			content of the ColdFusion custom tag to wrap the rendering in some additional
			layout. This works really well if the enhanced rendering is fairly
			straightforward. In this case, we're wrapping the given IMG inside a "tile".
			Notice that we can COMBINE the generated content with tag attributes (in this
			case we're passing in the "caption" as an attribute).
		--->
		<ex8:ImageTile caption="Ben Nadel and Dennis Field">
			<html:img
				src="https://bennadel-cdn.com/images/header/photos/dennis_field.jpg"
				width="400"
				height="204"
				alt="Ben Nadel and Dennis Field, thumbs-up style!"
			/>
		</ex8:ImageTile>

		<html:hr />

		<html:h2>
			Technique 4: Multi-slot content projection
		</html:h2>

		<!---
			If the native generated content feature of ColdFusion custom tags isn't
			sufficient, we can use multi-slot content projection. This combines the
			native generated content feature with a special Slot tag in the DSL that
			stores low-level generated content into the parent tag's variables space.
			In this case, we're using three slots to build an Avatar card. And, note
			that all the techniques build on top of each other - one of the Slots
			contains the Avatar encapsulation which uses data-attribute encapsulation.
		--->
		<ex8:AvatarCard>
			<core:Slot name="avatar">
				<ex8:Avatar
					initials="BN"
					size="42"
					fontSize="16"
					margins="none"
				/>
			</core:Slot>
			<core:Slot name="name">
				Ben Nadel
			</core:Slot>
			<core:Slot name="email">
				ben@bennadel.com
			</core:Slot>
		</ex8:AvatarCard>

	</core:Body>
</core:Email>
And, if we run this HTML email through Litmus, we can see that this rendered quite solidly across even really old email clients (I'm looking at you Outlook 2013 on Windows!):
AOL Mail in Explorer
Apple Mail 12 on MacOS
Gmail App on iOS 13

IBM Notes 10 on Windows 10
iPhone 11 Pro
Outlook 2013 on Windows 10
Outlook 2016 on MacOS
This is looking pretty solid! And, the complexity of the top-level code in the HTML email is still fairly simple. At this point, I think we have all the tools we need to start rendering complex HTML emails using ColdFusion custom tags in Lucee CFML 5.3.7.47.
Want to use code from this post? Check out the license.

Reader Comments
Hi Ben. This really is a great series!
Have you looked into Microsoft's VML language. It can help with many issues, including the render of rounded rectangles, which is easy with standard HTML/CSS.
I use this approach when I create e-mail templates.
Here is an example of how to create a rounded rectangle that is cross e-mail client compatible:
@Charles,
I've seen VML get discussed in a number of the posts that I've read, but I haven't look at it myself. Some posts recommended looking at https://buttons.cm/, which is from Campaign Monitor. It looks to also use this VML technique. I'll have to try this in my next post ;)
I must admit using VML is a bit fiddly. I only use it for adding rounded rectangles. And only for buttons. Anything more complex than buttons seems to fail...
But, it does look very satisfying to see a rounded rectangle in Windows Mail! Yes. I know. Sounds a little sad:)
@Charles,
Ha, being excited about Windows mail rendering ... you're in good company ;)
😂
@All,
These techniques work well when there's a thin layer between the calling context and the abstraction. However, if data needs to be defined at a high level and then exposed at a much lower level, getting the data to the right place by using tag attributes can be unnecessarily verbose. As such, for deeply-nested tags, I wanted to borrow an idea from Angular: Providers:
www.bennadel.com/blog/3992-using-coldfusion-custom-tags-to-create-an-html-email-dsl-in-lucee-cfml-5-3-7-47-part-xi.htm
The concept here is that a higher level context can define key-value pairs that can then be accessed in a lower level context. The mechanics are actually quite simple; but, explicit enough to not be "overly magical."
Hey Ben,
Thats a cool feature you have well elucidated.
I just want to quickly test if it works.
@Karl,
Very cool - glad you are finding this thought-provoking. I hope to be rolling this out at work soon for some real-world experience.