Generating Meme Images In The Browser Using html2canvas In Angular 9.0.1
Over the weekend, I was noodling on some ideas regarding image generation when I came across a blog post about "screenshots" by Daniel Sternlicht. In that post, Daniel was using a library called html2canvas (by Niklas von Hertzen) to generate screenshots of DOM nodes in the browser. The html2canvas works by programmatically rendering the UI to a canvas object. A few years ago, I used the canvas object to generate "HashTag" memes; which was a huge pain in the butt! So, I wanted to see how easy it might be to generate meme images using the html2canvas library in Angular 9.0.1.
Run this demo in my JavaScript Demos project on GitHub.
View this code in my JavaScript Demos project on GitHub.
The html2canvas library is kind of magical. I have no idea what it's actually doing under the hood; but, gosh-darn-it, it seems to work quite well and (apparently) has great browser support. You just give it a DOM node and it returns a Promise. When the Promise resolves, it gives you the canvas element on which the given DOM node has been programmatically "rendered":
html2canvas( domNode ).then(
	function ( canvas ) {

		// The canvas element contains your screenshot!

	}
);
Once we have this canvas element, we can grab the image data using - among other things - the .toDataURL() method. This method returns a PNG data-URI (by default) which can then use to render an img tag.
The whole experiment turned out to be quite straightforward! In the following Angular app, I'm allowing the user to edit the text of the meme directly in the browser using the [contentEditable] property. Then, when the user clicks the "Generate Meme", I take the meme image, along with the user's content, and pass it off to html2canvas:
// Import the core angular services.
import { Component } from "@angular/core";
import { ElementRef } from "@angular/core";
import html2canvas from "html2canvas";

// ----------------------------------------------------------------------------------- //
// ----------------------------------------------------------------------------------- //

interface GeneratedMeme {
	id: number;
	url: string;
}

@Component({
	selector: "app-root",
	styleUrls: [ "./app.component.less" ],
	template:
	`
		<div id="meme-element" class="meme">
			<img src="assets/this-is-fine.png" class="meme__image" />

			<div [contentEditable]="true" class="meme__caption">
				Users keep asking for new features.
				We keep focusing on our Linting rules.
			</div>
		</div>

		<p class="copyright">
			"This is Fine" dog orginally
			<a href="https://gunshowcomic.com/648">published by K.C. Green</a>.
		</p>

		<button (click)="generateMeme()" class="generate">
			Generate Meme
		</button>

		<ng-template [ngIf]="memes.length">

			<hr />

			<h2 #generatedMemes>
				Generated Meme Images
			</h2>

			<p *ngFor="let meme of memes">
				<img
					[src]="meme.url"
					(load)="scrollIntoView( generatedMemes )"
				/>
			</p>

		</ng-template>
	`
})
export class AppComponent {

	public memes: GeneratedMeme[];

	private elementRef: ElementRef;

	// I initialize the app component.
	constructor( elementRef: ElementRef ) {

		this.elementRef = elementRef;
		this.memes = [];

	}

	// ---
	// PUBLIC METHODS.
	// ---

	// I use html2canvas to generate a PNG of the current meme configuration. The
	// generated images is appended to the view.
	public generateMeme() : void {

		// The html2canvas library, at the time of this writing, is having trouble
		// generating canvas images if the window is scrolled down. To "fix" this, we
		// need to scroll the user back to the top before we initiate the screenshot.
		// --
		// Read more: https://github.com/niklasvh/html2canvas/issues/1878
		window.scrollTo( 0, 0 );

		var target = this.elementRef.nativeElement.querySelector( "#meme-element" );

		// Generate the screenshot using html2canvas.
		var promise = html2canvas(
			target,
			{
				logging: false,
				// The onclone callback gives us access to the cloned DOCUMENT before the
				// screenshot is generated. This gives us the ability to make edits to
				// the DOM that won't affect the original page content. In this case, I
				// am applying a special CSS class that allows me to tweak the padding
				// around the text.
				onclone: ( doc ) => {

					doc.querySelector( "#meme-element" )!.classList.add( "html2canvas" );

				}
			}
		);

		promise
			.then(
				( canvas ) => {

					// Once the screenshot has been generated (as a canvas element), we
					// can grab the PNG data URI which we can then use to render an IMG
					// tag in the app.
					this.memes.unshift({
						id: Date.now(),
						url: canvas.toDataURL()
					});

				}
			)
			.catch(
				( error ) => {

					console.warn( "An error occurred." );
					console.error( error );

				}
			)
		;

	}


	// I scroll the given HTML element into view, using smooth scrolling if available.
	public scrollIntoView( element: HTMLElement ) : void {

		// NOTE: The "options" are not available in all browsers.
		try {

			element.scrollIntoView({
				block: "start",
				behavior: "smooth"
			});

		} catch ( error ) {

			element.scrollIntoView();

		}

	}

}
As you can see, I'm just passing the target DOM node to the html2canvas() method; then, when the canvas object is asynchronously resolved, I am rendering an img tag using the canvas.toDataURL() value.
The html2canvas library is super easy to use. But, I was running into a few little stumbling blocks. First, the generated screenshot was getting clipped if the browser wasn't scrolled to the top. As such, right before calling the html2canvas library, I am programmatically scrolling the user back to the top of the window using:
window.scrollTo( 0, 0 )
The other issue was that the vertical alignment of the meme text wasn't quite right in the screenshot. Luckily, the onclone callback - one of the html2canvas options - grants us access to the cloned document being used to generate the screenshot. In this onclone callback, I am applying a special CSS class - .html2canvas - to the target DOM node that slightly changes the vertical text alignment prior to processing. This pre-rendering change just adjusts the padding property slightly on the .meme__caption class:
:host {
	display: block ;
	font-size: 18px ;
}

.meme {
	border: 1px solid #dadada ;
	margin: 0px 0px 0px 0px  ;
	padding: 0px 0px 0px 0px ;
	width: 700px ;

	&__image {
		display: block ;
		height: 340px ;
		margin: 0px 0px 0px 0px ;
		width: 700px ;
	}

	&__caption {
		color: #333333 ;
		font-family: "Patrick Hand SC" ;
		font-size: 35px ;
		line-height: 45px ;
		margin: 0px 0px 0px 0px  ;
		padding: 18px 30px 22px 30px ;
		text-align: center;
		text-transform: uppercase ;
	}

	// Tweaking the text positioning in the screenshot. For some reason, it seems to
	// slightly too low - we're bumping it up 2px.
	&.html2canvas {
		.meme__caption {
			padding-top: 16px ;
			padding-bottom: 24px ;
		}
	}
}

.copyright {
	color: #666666 ;
	font-size: 16px ;
}

.generate {
	background-color: #ff3366 ;
	border-radius: 4px 4px 4px 4px ;
	border-width: 0px 0px 0px 0px ;
	color: #ffffff ;
	cursor: pointer ;
	display: block ;
	font-size: 22px ;
	margin: 20px 0px 20px 0px ;
	padding: 20px 0px 20px 0px ;
	width: 702px ;

	&:hover {
		background-color: darken( #ff3366, 10% ) ;
	}
}
With that in place, if we run the Angular 9 app and click the "Generate Meme" button, the html2canvas library generates the following image:
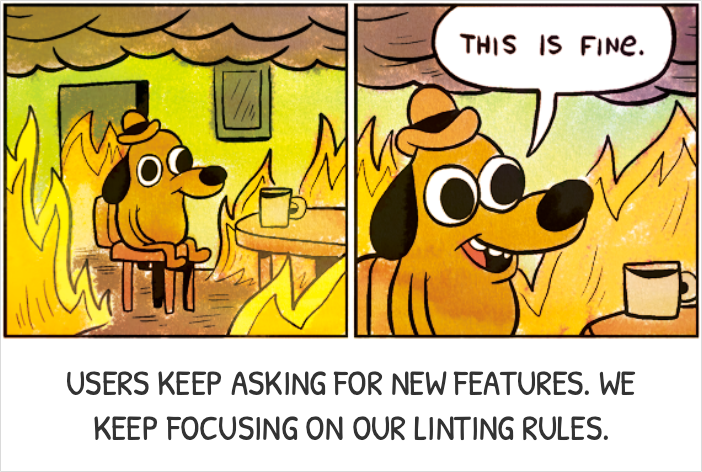
How freaking cool - and easy - is that!
The html2canvas library looks very powerful. And, it seems to have native TypeScript support; so, using it within an Angular 9 app is effortless. I've already got some fun ideas on how I can use this library for great good!
Want to use code from this post? Check out the license.

Reader Comments
Thank you a thousand times!!!
'window.scrollTo' and the 'onclone' saved my life!
@Vlad,
Awesome!! Glad to have been a help :D
@All,
This morning, I just posted another example of using
html2canvason the web: generating PDF signatures as transparent PNGs:www.bennadel.com/blog/4262-generating-pdf-signatures-with-google-fonts-and-html2canvas-in-javascript.htm
Hopefully, most people sign a PDF online using something like DocuSign. But, as a whole, we're not quite there yet; and, sometimes, I still get a PDF via email to sign. To make that a bit easier, I'm using
html2canvasand Google Fonts to generate signature images which can then be used to annotate PDFs using apps like Mac Preview.