
Code Kata: Water Breathing Exercise In JavaScript
Yesterday, I happened upon a TED Talk by Lucas Rockwood on the power of breathing. In his talk, Rockwood covered three different types of breathing: Water, Whiskey, and Coffee, each with different inhale, exhale, and pause tempos. As I was trying this out for myself, I found it very challenging to both count in my head and breathe at the same time (much harder than walking and chewing bubble-gum). And, it occurred to me that it might be a fun code kata to create a visual "metronome", of sorts, that would walk me through the breathing via JavaScript.
Run this demo in my JavaScript Demos project on GitHub.
View this code in my JavaScript Demos project on GitHub.
For this code kata, I wanted the JavaScript to keep track of the inhales, the exhales, and the overall breath-count so that I could focus on the breathing alone and nothing else. I also wanted it to be more than a counter since a count is an intermittent step-function whereas breathing is a continuous activity. As such, I wanted to include some form of continuous animation that would compliment my own lung activity.
After playing around with a few ideas, I realized that I could create a very pleasant animation by taking a box and animating it up from 0% to 100% during the inhale; and then, back down to 0% for the exhale. This way, even though the counter only updates every 1s, the animation will continue to animate seamlessly across the "ticks" of the clock (interval).
In the case of Water Breathing, the inhale and exhale tempos are the same. But - in theory - I can easily adjust the tempos by programmatically setting the transition-duration during each phase of the breathing cycle. Using a transition CSS property for this code kata feels like a real win!
The code kata has three different states:
- Ready.
- Running → the actual breathing.
- Done.
In a more robust application, I would likely handle these three states as three different Angular components, each with their own event-bindings. However, for the code kata, I'm going to keep things "closer to the metal". And, I'm going to use a tiny "state machine" to manage the interface and view-model.
Essentially, each state is implemented using a JavaScript class (in the loosest sense). The JavaScript class constructor will acts as the "setup" phase of the state. And, each class will expose a teardown() method that acts as the "teardown" phase of the state.
To keep things simple, each state knows which other states it can transition to. At which point, it will call a gotoState( Constructor ) method:
var activeState = null;
// Each one of the ".states__state" containers (above) is controlled by a State
// class (below). Each state has a setup phase (the constructor) and a teardown
// phase (an explicit method call). To keep things simple, each State knows which
// State it needs to transition too (as opposed to emitting events).
gotoState( ReadyState );

// I move from the current active state to the given state constructor.
function gotoState( State ) {

	if ( activeState ) {

		activeState.teardown();
		activeState = null;
	}

	activeState = new State();

}
As you can see, the state machine if very minimalist - it's just a series of JavaScript constructors that know how to call each other. Starting with the ReadyState.
To get a sense of what we're achieving here with this code kata, it might be helpful to look at a demonstration first. Here's an abbreviated view of the Water Breathing experience:
As you can see, there are two different aspects here: the counter and the breathing meter. In this demo, I explicitly clicked-through to the end state; however, if were to let the running state continue, it will automatically proceed to the end state after 10-cycles.
The visual representation of the breathing is managed through a CSS transition property that is programmatically adjusted during the phases of breathing. In the following snippet, the targetInCount and the targetOutCount variables represents the inhale and exhale tempo in seconds, respectively:
// I setup the meter to show the inhale animation.
function setupMeterForIn() {

	meterBarNode
		.css( "transition-duration", ( targetInCount + "s" ) )
		.css( "height", "100%" )
	;

}

// I setup the meter to show the exhale animation.
function setupMeterForOut() {

	meterBarNode
		.css( "transition-duration", ( targetOutCount + "s" ) )
		.css( "height", "0%" )
	;

}
To mimic the way I perceive my breathe to work during this exercise, I'm also applying:
transition-timing-function: ease-in-out
... so that the speed of the animation slows down at the ends of each breath.
Now, all of this depends on the setInterval() and the transition-duration lining-up in terms of execution time. On my computer (a 2015 MacBook Pro), this isn't a problem; however, a "busy" device or a low-powered device may have issues? I am not really sure. And if it was a challenge to get the timing to work, I am not entirely sure how else I would approach this.
With all that said, here's the full code kata JavaScript and HTML code - the HTML view is at the top and the states are defined down below in the <script> block:
<!doctype html>
<html lang="en">
<head>
<meta charset="utf-8" />
<title>
Code Kata: Water Breathing Exercise In JavaScript
</title>
<link rel="stylesheet" type="text/css" href="./demo.css">
</head>
<body>
<div class="states">
<div class="states__state states__state--ready">
<div class="states__content">
<h1 class="title">
Water Breathing Exercise
</h1>
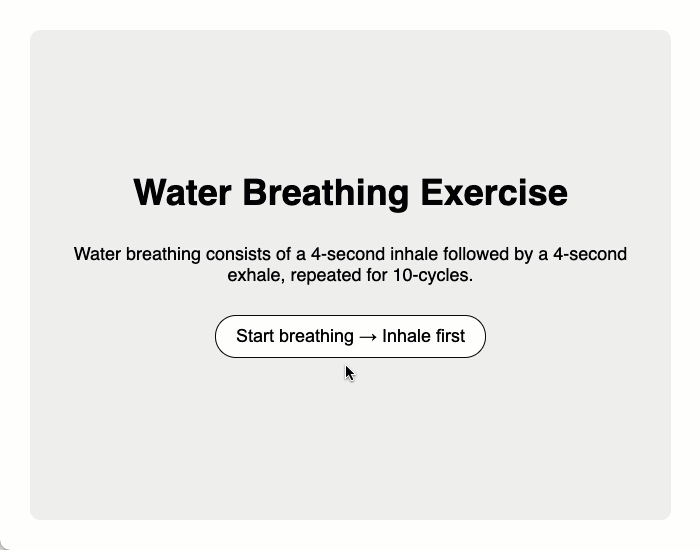
<p class="description">
Water breathing consists of a 4-second inhale followed by a 4-second
exhale, repeated for 10-cycles.
</p>
<div class="buttons">
<button class="button button--start">
Start breathing → Inhale first
</button>
</div>
</div>
</div>
<div class="states__state states__state--running">
<div class="states__content">
<h1 class="title">
Water Breathing Exercise
</h1>
<p class="description">
<!-- To be populated programmatically. -->
</p>
<div class="meter">
<div class="meter__bar"></div>
</div>
<div class="buttons">
<button class="button button--stop">
Stop breathing
</button>
</div>
</div>
</div>
<div class="states__state states__state--done">
<div class="states__content">
<h1 class="title">
Be At Peace With JavaScript
</h1>
<p class="description">
There's nothing you can't do with a For-loop and a few If-statements.
</p>
<div class="buttons">
<button class="button button--restart">
Go again
</button>
</div>
</div>
</div>
</div>
<!-- ---------------------------------------------------------------------------- -->
<!-- ---------------------------------------------------------------------------- -->
<!-- Load scripts. -->
<script type="text/javascript" src="../../vendor/jquery/3.6.0/jquery-3.6.0.min.js"></script>
<script type="text/javascript">
var activeState = null;
// Each one of the ".states__state" containers (above) is controlled by a State
// class (below). Each state has a setup phase (the constructor) and a teardown
// phase (an explicit method call). To keep things simple, each State knows which
// State it needs to transition too (as opposed to emitting events).
gotoState( ReadyState );
// I move from the current active state to the given state constructor.
function gotoState( State ) {
if ( activeState ) {
activeState.teardown();
activeState = null;
}
activeState = new State();
}
// --------------------------------------------------------------------------- //
// --------------------------------------------------------------------------- //
function ReadyState() {
var rootNode = $( ".states__state--ready" )
.addClass( "states__state--active" )
.on( "click", ".button--start", handleStartClick )
;
return({
teardown: teardown
});
// ---
// PUBLIC METHODS.
// ---
// I teardown event-bindings and settings.
function teardown() {
rootNode
.off()
.removeClass( "states__state--active" )
;
}
// ---
// PRIVATE METHODS.
// ---
// I handle clicks on the start button.
function handleStartClick( event ) {
gotoState( RunningState );
}
}
// --------------------------------------------------------------------------- //
// --------------------------------------------------------------------------- //
function RunningState() {
var rootNode = $( ".states__state--running" )
.addClass( "states__state--active" )
.on( "click", ".button--stop", handleStopClick )
;
var descriptionNode = rootNode
.find( ".description" )
.text( "" )
;
var meterBarNode = rootNode.find( ".meter__bar" );
// Configuration for the breathing cycles.
var targetInCount = 4;
var targetOutCount = 4;
var targetCycleCount = 10;
var currentCount = 1;
var currentCycle = 1;
var currentDirection = "in";
renderCount();
// CAUTION: Resetting the meter causes forced reflow in order to set the
// height of the meter without incurring a transition period in the CSS.
resetMeter();
setupMeterForIn();
// The running phase is essentially time-based. As such, we need to setup an
// in interval that will move the state and view-model forward.
var intervalToken = setInterval( handleTick, 1000 );
return({
teardown: teardown
});
// ---
// PUBLIC METHODS.
// ---
// I teardown event-bindings and settings.
function teardown() {
clearInterval( intervalToken );
rootNode
.off()
.removeClass( "states__state--active" )
;
}
// ---
// PRIVATE METHODS.
// ---
// I handle clicks on the stop button.
function handleStopClick( event ) {
gotoState( DoneState );
}
// I handle increments in the tick count (time marching forward).
function handleTick() {
// User is currently inhaling.
if ( currentDirection === "in" ) {
// If we've reached the end of our inhale, start the exhale.
if ( ++currentCount > targetInCount ) {
currentDirection = "out";
currentCount = targetOutCount;
setupMeterForOut();
}
// User is currently exhaling.
} else {
// If we've reached the end of our exhale, start the inhale.
if ( --currentCount < 1 ) {
// The exhale concludes a cycle. If we've reached the number of
// cycles targeted by this exercise, move to the Done state.
if ( ++currentCycle > targetCycleCount ) {
gotoState( DoneState );
return;
}
currentDirection = "in";
currentCount = 1;
setupMeterForIn();
}
}
renderCount();
}
// I render the current cycle and count.
function renderCount() {
if ( currentDirection === "in" ) {
descriptionNode.text( "Cycle: " + currentCycle + " - In: " + currentCount );
} else {
descriptionNode.text( "Cycle: " + currentCycle + " - Out: " + currentCount );
}
}
// Since we're never ripping the DOM nodes out of the DOM, any height that is
// applied to the meter will persist across the different states. As such,
// when we start the Running state, we have to make sure that we reset the
// height of the progress bar WITHOUT A TRANSITION DURATION before we start
// animating the meter for the breathing.
function resetMeter() {
meterBarNode
.css( "transition-duration", "0s" )
.css( "height", "0%" )
// Force a repaint of the meter to make sure that we reset the height
// of the progress bar to 0% before we start the transitions.
.height();
;
}
// I setup the meter to show the inhale animation.
function setupMeterForIn() {
meterBarNode
.css( "transition-duration", ( targetInCount + "s" ) )
.css( "height", "100%" )
;
}
// I setup the meter to show the exhale animation.
function setupMeterForOut() {
meterBarNode
.css( "transition-duration", ( targetOutCount + "s" ) )
.css( "height", "0%" )
;
}
}
// --------------------------------------------------------------------------- //
// --------------------------------------------------------------------------- //
function DoneState() {
var rootNode = $( ".states__state--done" )
.addClass( "states__state--active" )
.on( "click", ".button--restart", handleRestartClick )
;
return({
teardown: teardown
});
// ---
// PUBLIC METHODS.
// ---
// I teardown event-bindings and settings.
function teardown() {
rootNode
.off()
.removeClass( "states__state--active" )
;
}
// ---
// PRIVATE METHODS.
// ---
// I handle clicks on the restart button.
function handleRestartClick( event ) {
gotoState( RunningState );
}
}
</script>
</body>
</html>
Anyway, this was just a fun little JavaScript and jQuery code kata. It uses some technique that I don't use very often. And, it embraces the use of animation - something that I usually try to avoid as much as possible (since animation makes a UI feel sluggish and unresponsive).
Want to use code from this post? Check out the license.

Reader Comments
I love Javascript, and also Rockwood, hope to code with your guys😀😀😀😀
@Mala,
JavaScript is awesome, indeed. I'm actually thinking of getting on of Rockwood's courses on flexibility. I'm super not flexible, and could use some more mobility for sure.
Once again, spaghetti code with a lot of mistakes.
Do you have enough brave to answer comments? Or you will remove my comments once again?
If you a co founder of invision, for me it's clear why it's so slow and bad.. 👎
@Alex,
What mistakes? What spaghetti? You ask me if I am brave enough to answer comments, and I'm asking you if you are brave enough to have constructive suggestions.
@Ben,
Yes sure, just check your code. I haven't seen such bad code for a lot of time, are you from India?
@Alex,
Show us something better code guru and we might respect you —- Ben's code is procedural in nature because he's old school - but he's 100% professional and consistent as they come. He's a highly respected developer because he CAN implement pretty much anything he wants — can you? I'm from Missouri brave guy —- show me don't tell me.
I'm much more object oriented developer mostly because I'm trained in Java and specialize in Spring but Ben is pound for pound far more successful than I am and I'm a damned good developer in the polyglot sense.
Show up