
Creating Transparent Images With ColdFusion 8 And ImageNew()
How can you create transparent images using ColdFusion 8's new image manipulation functionality? I get this question asked of me sometimes and I feel like the ColdFusion 8 documentation is especially unclear as to how this is done. In fact, I think the ColdFusion 8 documentation is unclear as to whether or not this is even possible. Look at one of the Notes that is part of the documentation:
Note: If you specify the ARGB image type, the image is white; however, if you specify RGB or grayscale, the image is black. To create blank images consistently, use the canvasColor parameter.
This statement isn't necessarily unclear; I think it's just downright misleading. At first glance, it looks like the canvas type, ARGB or RGB, simply changes the background color from white to black. Then, it says to create a "blank" canvas consistently, use the cavasColor parameter. What does "blank" mean? Transparent? Empty? If the first sentence talked about color, then it might lead that the second sentence talks about transparency?? This is all very poorly worded and doesn't mention "transparent" properties at all.
You might think that maybe it has to do with the default drawing color, but it does not. Whether you create a canvas of type RGB or ARGB, the default drawing color is still white.
Despite the confusing live docs, rest assured that creating a transparent canvas (transparent image) in ColdFusion 8 is not only possible, it is, in fact, quite simple. The trick is to use the canvas type ARGB and to not specify a canvas color at all. The "A" in "argb" stands for "alpha" and provides the canvas with an alpha channel (for transparency). Then, by not specifying the canvas color, which is an optional argument, we make sure not to cover the transparent background with a color fill.
Take a look at the following example:
<!DOCTYPE html PUBLIC "-//W3C//DTD XHTML 1.0 Transitional//EN" "http://www.w3.org/TR/xhtml1/DTD/xhtml1-transitional.dtd">
<html>
<head>
	<title>Createing A Transparent Canvas With ImageNew()</title>

	<style type="text/css">

		body {
			background-image: url( "striped_background.gif" ) ;
			}

		p {
			text-align: center ;
			}

		img {
			border: 3px solid #990000 ;
			}

	</style>
</head>
<body>

	<h1>
		Createing A Transparent Canvas With ImageNew()
	</h1>


	<!---
		We want to create a transparent canvas with
		ColdFusion 8's ImageNew() function. We are creating
		this image on the fly so we have no source image,
		hence the empty first argument. To create a transparent
		image, use the ARGB canvas type (the "A" stands for
		alpha and gives our canvas an alpha channel).

		NOTE: Leave out the 5th optional arguemnt, the canvas
		color in order to create a transparent canvas.
	--->
	<cfset imgCanvas = ImageNew(
		"",
		200,
		200,
		"argb"
		) />

	<p>
		<!--- Write to browser. --->
		<cfimage
			action="writetobrowser"
			source="#imgCanvas#"
			format="png"
			/>
	</p>

</body>
</html>
In this code, the BODY of the document has a striped background so that we can easily see whether or not the image canvas is transparent. In the ImageNew() method call, we specify the image type, ARGB, and do not pass in the 5th optional argument, which is the background color (remember, we don't want a background color). Running the above example, we get this output:
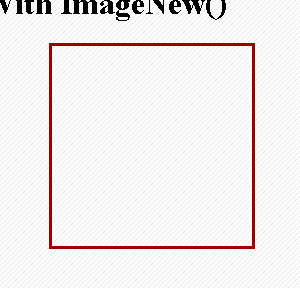
The transparent image is successfully created and written to the browser. Of course, we didn't have to write it to the browser, we could have written the image to the file system instead.
Want to use code from this post? Check out the license.

Reader Comments
Just wondering in what scenario you'd want to generate a transparent image on the fly? Can't think of anything off the top of my head. Either way, thanks for another great tutorial!
@Dave,
I don't think it's that often that you would ever need your "primary" graphic to be transparent; however, if you were going to build a graphic using multiple parts, on the fly, you might want to create a bunch of transparent images which would then be pasted onto the "primary" image.
Now, you might just ask, why not work directly on the primary image itself? I think there is something nice to being able to compartmentally construct an image using smaller, individual images, and then merging them all together. This allows for image aspects to be reused among different algorithms and gives you the added bonus of being able to more easily determine the height and width of a given image sub-component.
Hi Ben,
I know its long past the date of this blog entry but I was wondering if you could actually give your "primary" image a transparent background.
I have a catalogue of images (all JPGs) that either fill the space of the image or are on a white background. I use the following simple code to show a 100 x ? thumbnail of the image:
Jacket = ImageRead(Path);
ImageResize(Jacket, "100", "");
However, sometimes the thumbnail appears on a background color other than white so it would be great if I could make the background transparent instead of white.
Any insights on how to accomplish this?
Dave
Ben Is there a simple way to Use this to set a single color to transparent on a PNG image...
I would like to browse a directory of JPG and BMP images...Convert them to PNG, and then find the color in the 0,0 pixel and make That color transparent throught the image...Any clue how i would do this?
@Scott,
No clue :) I know what you're talking about though; in Fireworks, I can make index-transparencies. I think you might have to iterate over the entire image, check the pixel color, and if matching, slice it out. I think it would take a LOT of processing.
... hmm, just had an idea. If I can get some time, I'll see what I can do.
Hi. Ok how to save the created transparent image to the directory Please!
@Misty,
You just need to use the CFImage tag with the WRITE action. Or, use ImageWrite() method.
OK Cool! Thanks I solved it
But i issue sttrikes:
when i do this way:
<cfset ImageWrite(imgCanvas,"logo.png")>
it works:
when i try to save in a folder :
like this <cfset ImageWrite(imgCanvas,"images/logo.png")>
or
<cfset ImageWrite(imgCanvas,"#request.path#images\logo.png")>
it did not work.
request.path has full qualifying url
i get this error:
An exception occured while trying to write the image.
Ensure that the destination directory exists and that Coldfusion has permission to write to the given path or file. cause : java.lang.NullPointerException
@Misty,
It used to be that all paths in ColdFusion needed to be absolute paths. Then, as new functions were added, a lot of paths could be optionally relative. I cannot keep them straight in my head - which can be relative or not. As such, I usually use full, absolute paths for all of my file reads / writes for just about everything. Try using a path that starts at the drive (ex. c:\...)??
A good use scenario for this is when you need to use rotated text on a webpage and need it to appear consistent in all browsers. I also needed to take the same images and generate a PDF.
I recently discovered that CFDocument has problems with transparent PNGs in CF8. Until I get it fixed, here's a test page with sample code and transparent images that were created using your imageUtils library (to identify text boundaries, expand and crop.)
http://www.ssmedia.com/test/
@James,
The GIFs looks a bit jagged. But, that might be because they don't support partial alphas. When something needs anti-aliasing AND transparency, you might want to go with PNG in general.
I am 100% in favor of using PNGs for all non-photo images. The resultant filesize is 3-6 times smaller and the image has better anti-aliasing when transparent.
However, I don't have any idea why the PNG images are repeated. Did you see the sample I posted? The PNGs are duplicated. I have 7 unique image files, but after converting to FlashPaper or PDF using CFDocument, the unique images are reduced to only 2 (and the others are all repeated.) I'm trying to determine if this bug can be duplicated on other CF8/CF9 servers or isolated to only mine.
NOTE: I know you like jQuery. I've been using the jQuery PNGFix plugin to support IE6 users.
http://jquery.andreaseberhard.de/pngFix/
Hey... working on a jQuery Themes type tool built in ColdFusion. This could be the answer. Have you used this technique to refactor graphics? I will need to recolor the icon graphics and such... and keep the transparency.
@John,
I have no tried anything of that sort- that's an interesting idea. Are you basically trying to give each icon a "tint"?
@Ben Nadel,
If you try out Theme Roller you will get the idea. You can choose a color and it roloads the page with the color adjusted images. This basically allows you to adjust both saturation and hue in color speak. :) That is my goal also. Perhaps there is a Flash library that would allow the same thing client side, willing to take it there also.
@John,
Yeah, I know exactly what you're talking about now. That is a good question. I wonder how they create all their sprites on the fly in differnet colors. If I can, I'll do some thinking on the matter.